March 5, 2012

Blue/Purple Sparkles!!!

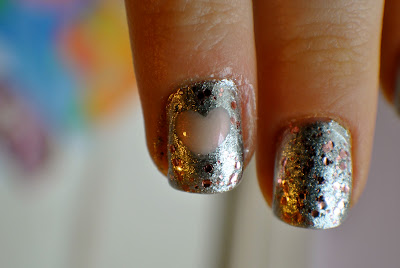
Today I decided to go all out with the glitter polish! I grabbed two Urban Decay polished (they don't have names on them sorry) and felt inspired! The Urban Decay polished are just glitter on a clear base so I had to pick some base colors. I used Orly "Blue Suede" under the blue sparkles and Sally Girl "Manic" under the purple. Instead of just boringly alternating colors, I decided to paint all the nails on my right hand blue except my ring finger and thumb which I painted purple. I then did the opposite on my left hand. 
This is the final product!
Hope you liked my sparkly design! Love!


February 27, 2012

Silver and Turquoise Shatter!

OPI Shatter Polish is super fun so I decided to mix it up and use two! I started with my FAVORITE black polish, Butter London "Union Jack Black." After that I used OPI "Silver Shatter" on all my nails, except my ring fingers and thumbs. On those nails I used OPI "Turquoise Shatter."
(Quick Tip) A lot of times people ask my how I get shatter polish to look good. The key is to use a very small amount of polish. If you glob it on, the polish wont crack very much. So just put one medium to thin coat of Shatter Polish all over the nail and you'll be set! If you want you can also experiment with the direction you apply the polish. Try diagonally, horizontally, or a mix just get creative and have fun with it!

So this was the final product!
Hope you liked my design. Till next time, Love!

February 25, 2012

Fancy Cubey Konad Stamp!

I've been dying to try out my new Konad plate and yesterday I finally got the chance! For this design my base color was China Glaze #544 "Liquid Leather." After two thin coats of that I started with the Konad stamping.
 The design I chose was the one pictured in the bottom right corner. I used white Konad Special Polish for the stamps. To give my nails a little variety I stamped just halfway up the nail on all my fingers except my ring fingers. For those I stamped the full nail.
 My final product was this!!! I absolutely love this design, I think it is my new favorite!
 I hope you liked the design and consider getting some stamps for yourself. They are so great for creating designs because they are so easy! (and no konad is not paying me...) Good luck and lots of love!

February 21, 2012

"I Want to Be A-Lone Star" Polish Review!!!

Howdy Ya'll!!! Excuse my super-d-duper texan grammar but I felt it was necessary considering I'm reviewing a polish from the OPI Texas Collection. This polish is called "I Want to Be A-Lone Star" and it is a beautiful pearly baby blue. I am in love with this color. It applies okay, it is a little streaky and needs at least 2-3 coats to get it perfect but it is so worth it!
Here is the polish in two different lights. This color reminds me so much of Cinderella. It is totally princess worthy!
Hope you liked the review! Till next time, Love!

February 17, 2012

Nail Magic!!! Its Magical!

Today I'm doing something a little different. This is a review on my favorite nail strengthener in the whole wide world! Nail Magic Nail Hardener, it really is magical!!! (btw no I'm not getting payed to post this I've been using this nail strengthener way before I started this blog and have always loved it!)
People ask me quite often if my nails are real or not. This is because my nails are super strong, all the same length and almost never chip. No I was not born with super strong hulk nails. I actually used to have horrible nails, they were bendy and cracked way too often. I found the solution to this problem at Sally's Beauty Supply Store. (no they are not paying me either.... I wish...) This strengthener can be used as a base coat or under your base coat. I use it every time i paint my nails which is about twice a week. After about a month my nails became strong and amazing. So if you are having weak nail issues then stop by Sally's and pick up some Nail Magic. I promise you wont regret it!

(P.S. Did you like my review? Let me know. Love!)

February 13, 2012

Swirly Sparkly Love!!!

Valentines Day is tomorrow so this nail design is extra fancy! I started this lovely design by painting every nail, except my ring fingers, with OPI "Sweetheart." Then I painted my ring fingers with a super sparkly Urban Outfitters polish. For most of my nails I used a needle drag technique to get a swirly pattern on my nails. If you wanna see how its done click this link Easy Needle Drag Nail Art Design Tutorial. I used "Sweetheart" and OPI "Off With Her Red" to do the needle dragging.
On my ring fingers I used Confetti Nail Color "Wedding White" to draw two hearts on the nail, then went over the hearts with "Sweetheart." This was the finished product!
I'd also like to say thanks to everyone who looks at my blog whether your subscribed or not. I hope you enjoy my designs and have a happy Valentines Day.
(P.S. I'd like to say thanks to my lovely sister for the Valentines Card, its really pretty.)

February 11, 2012

Heart Tips Valentines Day Nails!

My second Valentines Day nail design is here! I started off with an Urban Outfitters nail color called "Cocktail."
 Then I used a Konad stamping pattern to give my self adorable heart french tips. This is what the set looks like if you've never heard of Konad before.
 After doing all that the final product was this!
Hope you liked this design and remember theres one more Valentines Day design left so stay tuned. Love!

February 6, 2012

Silver but Sweet Valentines Day Nails

Valentines Day is only 2 posts away! So here's my first Valentines Day themed design. For this design I used China Glaze "Icicle," OPI "Sweet Heart," "Who Needs A Prince," and a pink sparkly polish by Sally Girl.
I started by painting every nail with two coats of "Icicle." Once that dried I applied two coats of the pink sparkle polish by Sally Girl. Once all that dried on my ring fingers I used OPI "Sweet Heart" to draw a heart. After that I put a very thin layer of OPI "Who Needs A Prince" on the hearts just to make them look a little shinier. Then I put a topcoat on each nail and was done!
Hope you liked this sparkly pink Valentines Day design! Have a sweet week! Love!

February 3, 2012

Deborah Lippmann "Get This Party Started" Review!!!

Today I decided to do a review on one of my favorite polish brands!!! I got a pack of three Deborah Lippmann nail polishes during the holidays and they are so great! The nail polishes in this pack from left to right are called "Candy Shop, "Happy Birthday," and "Forget You."
I am in love with these polished because you can do so much with them!!! Here are the polishes by themselves with just one coat of each.
 Then I decided to layer the polishes. I put a hot pink under "Cotton Candy," white under  "Happy Birthday," and black under "Forget You."
I absolutely adore these polishes! They are so fun and apply so easily! My favorite one is definitely "Happy Birthday" because there are so many different colors you could put under it! Hope you liked the review and hope you come back monday for a Valentines Day themed design!

January 30, 2012

Paw Power!!!!!

When my friend Kristen came over we did our nails together. In the end her nails looked so good I decided to put them on my blog!
First she put on two coats of OPI "Mermaid Tears." After that she put one coat of small sparkles on all her nails.
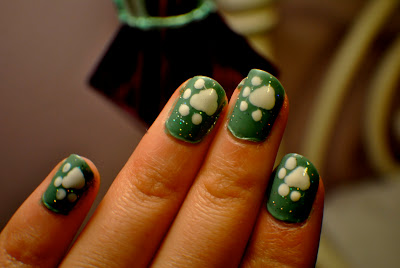
Last she used a dotting tool and a white striper polish to make medium sized paw prints on every nail.
In the end her nails looked like this!
This design was inspired by an "IHaveACupcake" nail tutorial video. Click this link to check it out.
I think Kristen's nails turned out awesome! I hope you liked them, and I hope you try them out for yourself! Love!