June 28, 2011

Comic Strip Nail Art

Today I decided to try out a fun nail design. I saw a video for comic strip nails wanted to try it myself.

I started with a coat of Nail Strengthener, then a coat of CND Sticky. Of course I sealed everything in with Seche Vite.
I tried a different white this time and used three very thin coats of Confetti Wedding White.
After my nails were completely dry I clipped pieces of comics from the newspaper. Then one at a time dipped them in rubbing alcohol and put the strip on my nail, held it there for 15 seconds, then slowly peeled it off. After I did all my nails I put top coat on and I was done! This is my final product.


Hope you try it out! Good luck!

June 22, 2011

Artful Dodger w/ Flowers

Today I decided to use one of the nail polishes I bought myself with my leftover birthday money. I splurged on a color by Butter London called Artful Dodger.

I Started with my usual Nail Strengthener, and Sticky by CND, finishing with Seche Vite.
Then I put two thin coats of Artful Dodger.
After both coats completely dried I decided my nails were too boring so I added some flowers using Konad nail art. This is a method that uses special nail polish and an engraved plate to transfer images from the plate using a stamp onto your nails. Heres a video that shows how it works. http://www.youtube.com/watch?v=9F3SeeWXuAc The Konad plate I used was M51. I used the flower in the middle for all my nails except for my pinky nail I used a smaller flower. (I stole this picture off of the main konad website. http://www.konadnailart.com/ )
This is my final product.
Quick Tip: When using Konad nail art wait a little bit before applying top coat. It may seem like the pictures are dry but if you apply top coat too soon you can smudge the picture like this.
Hope you liked this design and try it for yourself! Good Luck!

June 15, 2011

Across the Universe

For this weeks nails I decided not to do a crazy nail design and just use one of the polishes I got for my birthday, Across the universe by Deborah Lippmann.

I started with Nail Magic Nail Strengthener, then used CND's Sticky, and finished with Seche vite Top Coat.
Since "Across the Universe" is a very see through polish I put one coat of Blue Suede by Orly underneath.
Because I was using so many coats of nail polish I tried a new product to make the coats dry faster. This product is RapiDry Spray by OPI. About 45 seconds after I put the coat of Blue Suede on all my nails I sprayed RapiDry Spray on them and they dried instantly. So I'm lovin this product.
In the end, my nails looked like this!
I've decided I'm in love with this polish! Its not just a dark blue but it has huge blue and green sparkles and teeny blue sparkles. It's so pretty!!! So overall im happy with my nails, hope ya'll are too. If you have any ideas on what I should do next feel free to leave a comment and i'll see what I can do.
                                                          ~love!~

June 11, 2011

Sally Hansen Salon Effects!

Today I tried something a little different. I bought Sally Hansen Salon Effects in #220 Cut it Out a few days ago and finally today I tried it. I was a little skeptical at first but after seeing this youtube video http://www.youtube.com/watch?v=CpQfKtT8_EM I decided to try it out.

The box came with a nail file, two packages of the salon effects strips, a cuticle stick, and instructions.
I started out with clean nails. I then opened one package and figured out which strips I would use for which nail. Once I did that, I peeled back the clear side of one strip, then peeled off the nail polish strip from the backing and gently fit it onto my first nail. After I got it mostly centered I pressed it down and used scissors to cut off the end of the strip which I then used for another nail. This way I could use one package for all my nails and save the second for later. So, after I centered the strip on my nail I used the smooth side of the nail file to press it firmly down and used the rough side to file away the excess polish strip. Then I just repeated this with all my nails. I did decide, however, to put Seche Vite top coat on just to make the nails last even longer. This is the final product.
Overall I think these nail stickers are pretty awesome! I now have a pattern on my nails that I definitely could NOT do myself. They were pretty easy to apply and if they last as long as they say they do then they're great. I only have a few problems with them. #1 they're $10 dollars, and you could buy a really nice brand new nail polish for that much, and #2 they're kinda smelly.... but i guess thats only if you're resting your head on your hands. Overall these nails are fun, cute, and i give them an A! Hope you try them out yourself, there are so many patterns to choose from. Good luck!

June 7, 2011

Water Marbling!

Today I realized I didn't really like my nails that i did yesterday. I like the idea but next time i do them i want to make them neater. So today I was hanging out with my best friend and we decided to do our nails together. I then decided to try water marbling!

First I used my favorite nail strengthener followed by two coats of Orly French Tip. I later sealed everything in with Seche Vite.
To do water marbling you need a cup of distilled room temperature water, any nail polish colors of your choice, a toothpick, a cotton swab, and some masking tape.
The colors I used were Sally Hansen Xtreme Wear in #33 Pacific Blue, #34 Going Green, and #27 Mellow Yellow.
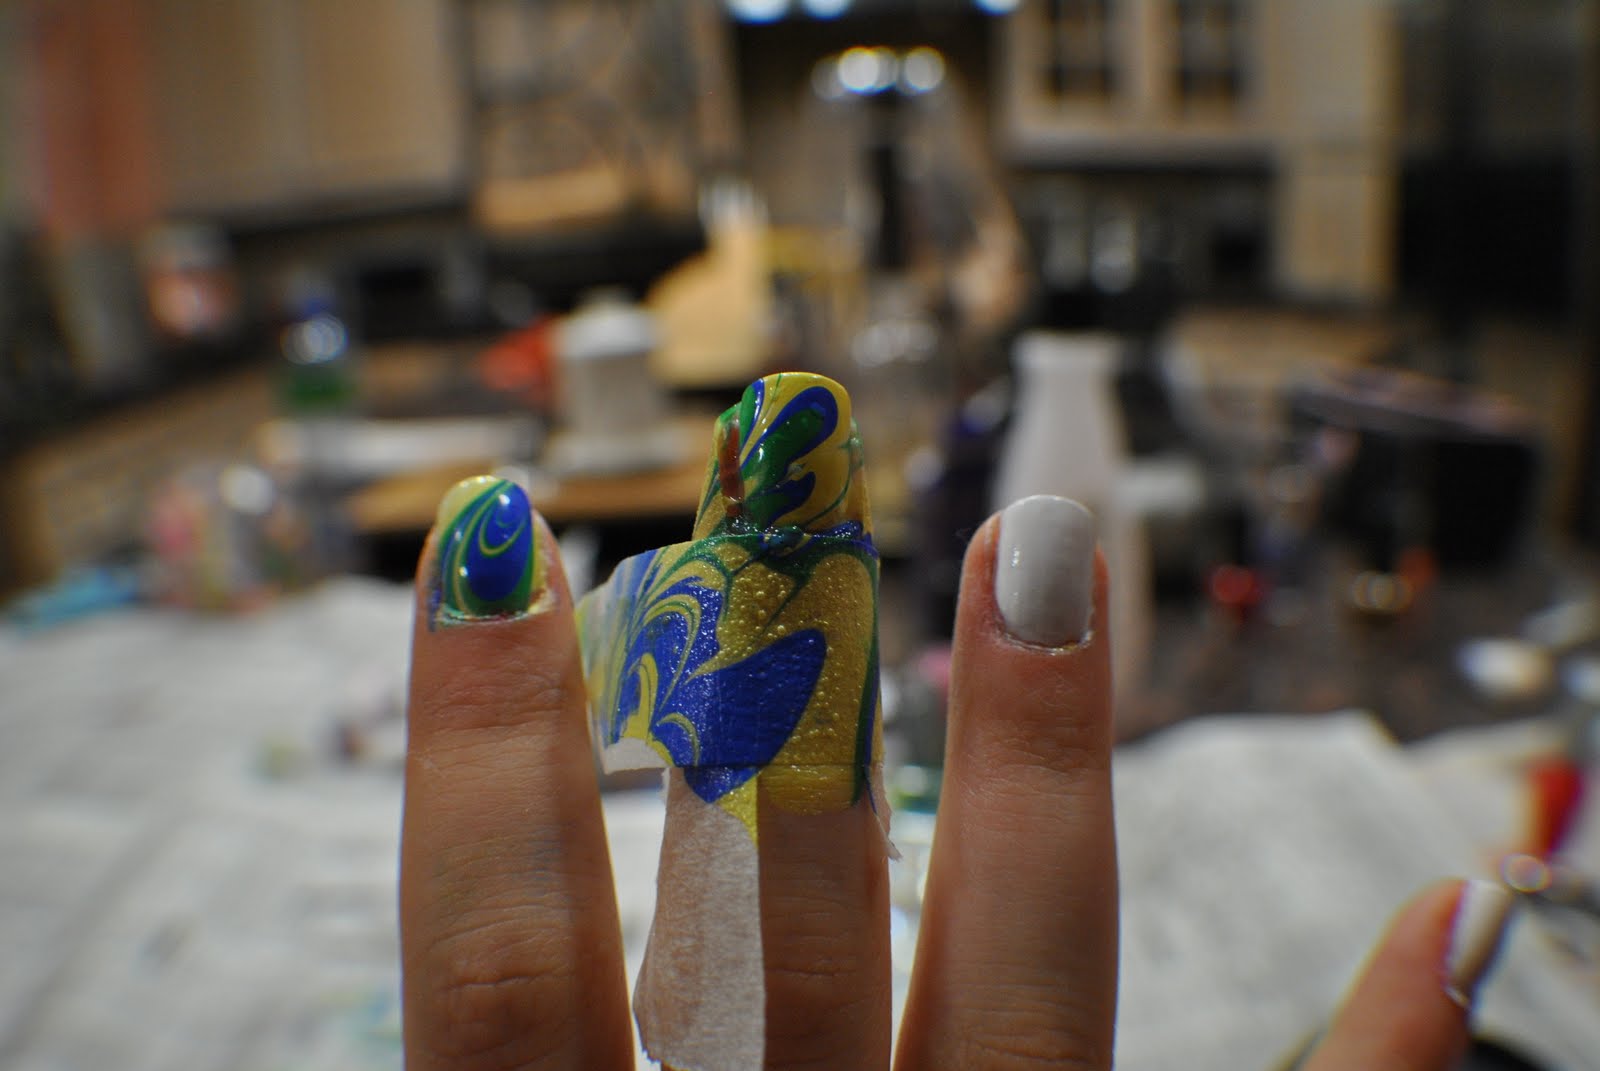
Once you have everything set up tape around your nail with masking tape like this.
Then start putting dots of nail polish into your water dropping the drop in the center every time. For this nail i did a drop of green, then yellow, then blue, and did this pattern twice.
I forgot to take a picture of my next step, but basically you take your toothpick and make patterns in the nail polish blob with it. After, you take your nail and dip it flat into the water. Hold it in the water for a little bit then use the cotton swab to take the extra nail polish of the surface. Carefully pull your nail out and you should have something that looks like this!
Then all you have to do is carefully take the tape off, do the rest of your nails, put a top coat, and your done! This was my finished product.
For my first attempt at water marbling i think i did pretty well. For more detailed instructions on how to do water marbling check out this video. http://www.youtube.com/watch?v=U7bwL2S7auk&feature=channel_video_title I hope you try this nail design out for yourself. Maybe using different colors? If you do feel free to send me pictures on facebook i would love to see how your designs turn out! Good luck!


June 6, 2011

SpLaTtEr PAINT!!!!!!

So this time i tried a nail design that i saw on youtube (here's a link) http://www.youtube.com/watch?v=lgukFFlohSQ its splatter paint nails!

To start out i used my fave Nail Magic Nail Hardener, i didnt use Sticky by CND because i didnt want my nails to be too thick since my base color is very thick. For my base i used French Tip, by orly. This is a perfect white because its made for doing french manicures so its super thick and pigmented. Then i used Seche Vite as my top coat.
After i put two coats of white, i began making big dots, one color at a time on each nail. After making the dot i used a tooth pick to make lines come out of each dot. The video in the link explains it way better. For my colors i used Sally Hansen, Hard as Nails, Xtreme Wear in;  #33 Pacific Blue, #34 Going Green, #6 Sun Kissed, and #27 Mellow Yellow. I also used Off With Her Red by opi, its a really pretty red from the Alice in Wonderland Collection.
Finally after an hour of work i got this as my finished product. This is my right hand.
Its pretty messy because this was my first try. But by my left hand i got the hang of it.
And there you have it! My first post of the official summer! Hope you liked it because there are MANY more to come! 
~love~